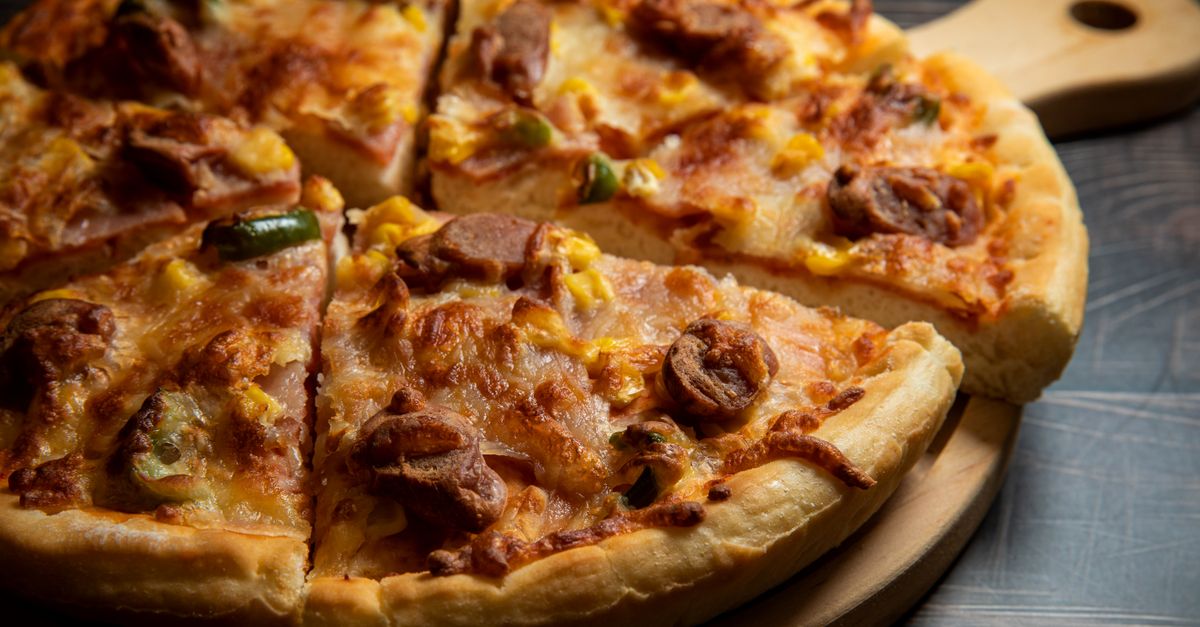
Why Your Homemade Pizza Crust Isn't Crispy (And The Pro Secrets That Deliver Pizzeria-Quality Crunch Every Time)
You’ve spent the evening meticulously crafting your homemade pizza. The sauce is simmering, the cheese is grated, and the toppings are ready. You slide it into the oven, brimming with anticipation for that perfect, golden-brown crust. But when it emerges, it’s… soft. Chewy. Perhaps a little soggy. It tastes good, sure, but it lacks that satisfying crack and irresistible crunch that defines a truly great pizza. If this scenario sounds painfully familiar, you’re not alone. Most home bakers struggle to replicate the crispy crust achieved by professional pizzerias, often blaming their conventional home ovens or a lack of specialized equipment.
In my experience, the problem isn’t your oven; it’s a series of often-overlooked technical mistakes that cumulatively sabotage your crust’s potential for crispness. We tend to focus on the dough recipe itself, believing that the right blend of flours or a longer proof is the silver bullet. While these are important, a truly crispy crust is born from mastering heat transfer, moisture management, and precise timing. What changed everything for me was understanding that a crispy crust isn’t an accident; it’s the culmination of intentional decisions at every stage, from dough preparation to the final bake.
Key Takeaways
- High heat and a preheated baking surface are non-negotiable for instantly setting the crust and achieving crispness.
- Controlling dough hydration and avoiding excess moisture from toppings prevents sogginess and promotes a dry, crispy texture.
- Strategic use of oil and a short pre-bake for certain doughs can enhance browning and develop a foundational crisp.
- Proper dough handling, including stretching and forming, prevents uneven thickness and ensures consistent heat distribution.
The Overlooked Power of Extreme Heat (And Your Preheating Mistake)
Most home bakers dramatically underestimate the heat required for a truly crispy crust. A professional pizza oven can reach temperatures well over 700°F (370°C), often closer to 900°F (480°C). Your home oven likely maxes out at 500-550°F (260-290°C). While this gap is significant, many people make it even wider by not properly preheating.
In my kitchen, the single biggest game-changer for crust crispness wasn’t a fancy new gadget, but simply allowing my oven to preheat for a full 45-60 minutes at its highest setting with my baking steel or stone inside. It’s not enough to wait for the oven light to tell you it’s reached temperature; the baking surface itself needs time to absorb and radiate enough heat to instantly set the dough. When cold dough hits a superheated surface, the sudden blast of heat creates a phenomenon called “oven spring,” rapidly expanding the air bubbles within the dough and forming a rigid, airy structure. This rapid setting is crucial for preventing the crust from becoming dense and chewy. Without this initial thermal shock, the dough has more time to slowly warm up and dry out, leading to a softer, less satisfying texture. Think of it like dropping a steak into a cold pan versus a screaming hot one – the latter gives you that incredible sear.
Actionable Insight: Always preheat your oven with a pizza stone or steel for at least 45-60 minutes at its maximum temperature (500-550°F / 260-290°C). This ensures the baking surface has stored enough thermal energy to give your crust the explosive start it needs for ultimate crispness. I’ve even added a smaller cast iron pan to the bottom rack during preheating; its mass helps stabilize the oven temperature further.
The Moisture Menace: Why Your Toppings are Secretly Sabotaging Your Crust
Pizza dough is a sponge. If there’s excess moisture present, it will absorb it, leading to a soggy, flabby crust. This is where most home cooks make crucial mistakes with their toppings and sauces. It’s not just about the amount of toppings, but their water content and preparation.
For years, I would innocently pile fresh, uncooked vegetables like mushrooms, bell peppers, or spinach directly onto my pizza. The result? A perfectly decent center, but a disappointingly soft, wet crust underneath. What I learned is that these high-water-content ingredients release their moisture during baking, which then pools on the dough. Similarly, using a very wet sauce, or too much sauce, contributes to the problem.
To combat this, you need a proactive approach to moisture management. For instance, sautéing mushrooms or bell peppers beforehand removes much of their water content, concentrating their flavor and preventing them from steaming your crust. Even high-moisture cheeses like fresh mozzarella should be drained thoroughly or blotted dry with paper towels. When using a tomato sauce, consider a thicker variety, or even reduce it slightly on the stovetop to intensify flavor and remove excess water. The goal is to create a dry, hot environment for your crust, allowing it to dehydrate and crisp up, rather than steam.
Actionable Insight: Pre-cook or thoroughly drain high-moisture toppings (e.g., mushrooms, spinach, bell peppers, fresh mozzarella). Use a thicker, well-reduced sauce, and don’t overdo the quantity. Blotting fresh mozzarella dry is a non-negotiable step in my kitchen now; it prevents those watery spots.
The Power of the Blind Bake (And a Touch of Oil)
Sometimes, even with careful moisture management, certain doughs or heavily topped pizzas can benefit from a short pre-bake, also known as a blind bake. This technique involves baking the crust without toppings for a few minutes to give it a head start on crisping up and forming a barrier against moisture.
I used to think blind baking was only for pie crusts, but applying a similar principle to pizza crusts for specific scenarios has been revolutionary. If you’re making a deep-dish pizza or one with a particularly high-hydration dough that tends to be softer, a 5-7 minute blind bake can prevent a soggy bottom. Simply press your dough into shape, brush it lightly with olive oil (which helps conduct heat and promotes browning), and bake it on its own on your preheated surface. The oil creates a beautiful, golden-brown foundation that crisps much better than dry dough. Immediately after this initial bake, you can add your sauce and toppings and return it to the oven for the final cook. This extra step ensures the base is firm and crispy before it even encounters wet ingredients.
Actionable Insight: For high-hydration doughs or heavily topped pizzas, consider a 5-7 minute blind bake. Brush the bare dough lightly with olive oil before the initial bake to encourage crispness and browning. This step is particularly effective for thick-crust or pan pizzas.
Dough Thickness & Handling: Your Blueprint for Uneven Crispness
The way you handle and stretch your dough profoundly impacts its final texture. A common mistake is creating an uneven crust – thick in some spots, thin in others. This leads to inconsistent baking: thin spots burn, thick spots remain soft or undercooked, and the overall crispness is compromised.
Achieving an even thickness is paramount. When stretching the dough, focus on working from the center outwards, gently pushing the air towards the rim to create a consistent, slightly thicker cornicione (the puffy edge). Avoid overworking the dough, which can develop too much gluten and make it spring back excessively, leading to unevenness. A well-rested dough that’s at room temperature is much easier to work with and allows for more even stretching. In my experience, using a small amount of flour or semolina on your work surface helps prevent sticking without adding too much extra raw flour to the dough itself, which can inhibit crisping.
Another crucial point: don’t poke holes in your pizza dough to prevent bubbling, unless you’re aiming for a cracker-thin crust. Those bubbles contribute to the airy, crispy texture. Instead, if you see a large bubble forming during baking, you can gently pop it with a fork or knife to prevent it from dominating the crust, but avoid excessive docking. The goal is an even, airy structure.
Actionable Insight: Always stretch your dough to an even thickness, aiming for consistency from the center to the edge. Work with room-temperature, well-rested dough for easier handling. Use minimal flour or semolina on your work surface, and generally avoid excessive docking of the dough.
The Finishing Touches: When to Add, When to Hold Back
The timing of adding certain ingredients, and even post-oven treatment, can make or break your crust’s crispness. Many people make the mistake of adding fresh herbs or delicate cheeses too early, causing them to burn or become brittle. More importantly, leaving a freshly baked pizza on a solid surface can quickly lead to a soggy bottom.
To ensure maximum crispness, consider when you’re adding finishing ingredients. Fresh basil, arugula, or a drizzle of high-quality olive oil are best added after the pizza comes out of the oven. This preserves their vibrant flavor and prevents them from steaming the crust during the final moments of baking. Similarly, don’t overload the center of the pizza with cheese or sauce, as this area is most prone to sogginess. A slightly lighter hand in the middle allows for better heat penetration and crisping.
Finally, and this is a mistake I see most often: never let a hot pizza sit on a flat cutting board or solid plate immediately after baking. The steam released from the hot pizza has nowhere to go and will condense on the bottom of the crust, turning it soft almost instantly. Always transfer your piping hot pizza to a wire cooling rack for at least 30-60 seconds before slicing. This allows air to circulate underneath, releasing the steam and preserving that hard-won crispness. It’s a small step, but it makes a monumental difference.
Actionable Insight: Add delicate fresh herbs and high-quality olive oil after the pizza exits the oven. Avoid overloading the center of the pizza. Most critically, always transfer your freshly baked pizza to a wire cooling rack for 30-60 seconds before slicing to allow steam to escape and maintain crispness.
Frequently Asked Questions
Can I get a crispy crust in a regular home oven without a pizza stone or steel?
While a pizza stone or steel significantly improves crispness by providing high, direct heat, you can still achieve a decent result. Place your pizza directly on a preheated baking sheet or even an inverted cast-iron pan, preheated with the oven for 30-45 minutes at maximum temperature. The key is still high, sustained heat. You won’t get the same intense thermal shock, but it’s better than a cold surface.
Does high-hydration dough make a crispier crust?
This is a common misconception. While higher hydration doughs can lead to a more open, airy crumb and a chewier interior, they are also more prone to sogginess if not baked correctly. For a truly crispy crust, especially at home oven temperatures, a dough with moderate hydration (around 60-65%) is often easier to manage and yields more consistent crisp results. If using high hydration, a blind bake is almost essential.
Should I use cornmeal or semolina on the peel to transfer the pizza?
Yes, using a light dusting of cornmeal or semolina on your pizza peel is highly recommended. It acts like tiny ball bearings, allowing the raw pizza to slide smoothly off the peel and onto your hot baking surface without sticking. This quick, seamless transfer minimizes heat loss from the stone/steel and ensures the crust begins crisping immediately. Just don’t use too much, or it can burn.
How long should I cook my pizza for maximum crispness?
Baking time varies significantly based on your oven’s temperature, the thickness of your crust, and the amount of toppings. At 500-550°F (260-290°C), a thin-crust pizza typically bakes in 8-12 minutes, while a slightly thicker crust might take 12-18 minutes. Look for a deeply golden-brown crust with well-charred bubbles and melted, bubbling cheese. The best indicator is always visual – trust your eyes more than a timer.
Can I make the crust crispy again if it gets soft after cooling?
Absolutely! If you have leftover pizza and the crust has lost its crispness, you can easily revive it. Place individual slices directly onto a dry, hot cast-iron pan or non-stick skillet over medium-high heat for 2-4 minutes, or until the bottom is crispy. Then, add a few drops of water to the pan (away from the pizza) and quickly cover with a lid for 30-60 seconds to re-melt the cheese and rehydrate the toppings. Alternatively, a quick reheat in a preheated oven (or air fryer) at 375-400°F (190-200°C) for 5-7 minutes will also work wonders, especially if placed on a wire rack.
Achieving that elusive pizzeria-quality crispy crust at home is not about having a professional oven, but about understanding and controlling the fundamentals of heat, moisture, and technique. By implementing these pro secrets—from super-hot preheating to meticulous moisture management and proper post-bake cooling—you’ll transform your homemade pizza from good to gloriously crispy. Stop settling for a soft crust and start experiencing the satisfying crunch you deserve. Your next pizza night is about to get a serious upgrade.
Written by Dr. Anya Sharma
Nutrition science, meal planning, dietary habits
A registered dietitian with a PhD in Nutritional Sciences, Anya focuses on sustainable eating habits and evidence-based dietary advice.
You Might Also Like

Why Your Home Garden Isn't Thriving (And The Simple Shifts That Changed Everything For My Harvests)
Struggling with a lackluster home garden? Discover the counter-intuitive shifts in soil, watering, and plant choice that transformed my harvests.
Why Your Homemade Cookies Are Flat (And The Simple Fixes That Guarantee Perfect, Puffy Results Every Time)
Tired of flat, lifeless cookies? Discover the overlooked mistakes that flatten your treats and learn simple fixes for perfect, puffy cookies every time.
Why Your Homemade Sauces Are Too Thin and Lackluster (And The Pro Secrets for Rich, Velvety Perfection Every Time)
Ever wonder why restaurant sauces are so rich while yours fall flat? Discover the professional techniques for velvety, flavorful homemade sauces.