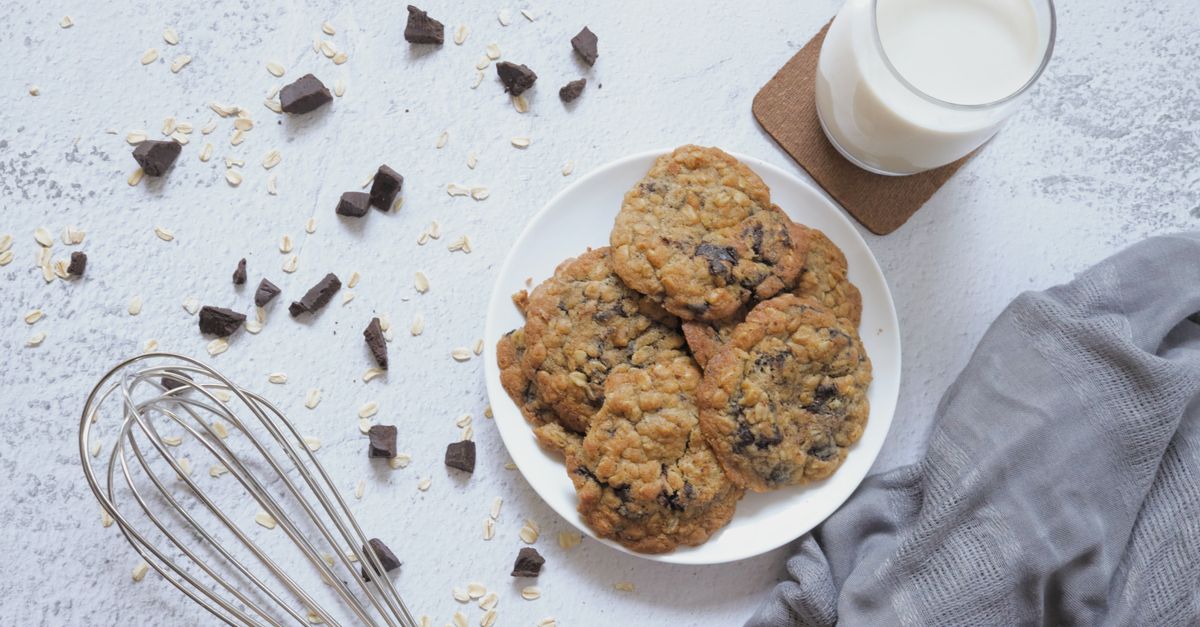
Why Your Homemade Cookies Are Flat (And The Simple Fixes That Guarantee Perfect, Puffy Results Every Time)
Picture this: you’ve spent an hour in the kitchen, carefully measuring, mixing, and scooping, envisioning a tray of golden-brown, gloriously puffy cookies. But when they emerge from the oven, they’re… flat. Like, pancake-flat. They taste fine, but they lack that satisfying chew and inviting rise that makes a truly great cookie. If you’ve ever felt this pang of cookie disappointment, you’re not alone. It’s a common baking woe, and often, the culprits are simpler than you think.
In my years studying food science and baking countless batches of cookies, I’ve seen firsthand how tiny missteps can lead to big textural failures. It’s rarely one monumental mistake, but rather a combination of subtle factors that conspire against your dough. The good news? Once you understand these hidden saboteurs, achieving consistently puffy, perfectly chewy cookies becomes not just possible, but easy.
Key Takeaways
- Ensure your butter is truly softened, not melted, and use full-fat butter for optimal structure.
- Measure flour precisely by weight or using the ‘spoon and level’ method to prevent excess.
- Chill your cookie dough for at least 30 minutes to solidify fats and prevent premature spreading.
- Use parchment paper or silicone mats for even heat distribution and avoid greased baking sheets.
The Butter Paradox: Softened vs. Melted (And Why It Matters So Much)
The state of your butter is arguably the most critical factor in determining cookie texture, and it’s where most home bakers unknowingly go wrong. Many recipes call for ‘softened butter,’ but what does that truly mean? It means butter that’s pliable enough to leave an indentation when you press it, but still cool to the touch and holds its shape. It should not be greasy or shiny, and certainly not melted.
Here’s the science: when you cream softened butter with sugar, you’re not just mixing them; you’re incorporating tiny air pockets into the butter. These air pockets are crucial. During baking, these trapped air cells expand, contributing significantly to the cookie’s rise and light texture. If your butter is too warm or melted, those air pockets can’t form effectively. The result? A denser, flatter dough that spreads out prematurely in the oven, leading to those disappointing discs.
Beyond temperature, the fat content of your butter plays a role. I always recommend using a good quality, full-fat butter (typically 80% butterfat or higher). Lower fat butter, or spreads masquerading as butter, often contain more water. This extra water turns to steam in the oven, causing the cookie to spread more rapidly before its structure can set, again resulting in flatness. Invest in good butter and let it come to a true room temperature (around 65-68°F or 18-20°C) – it’s worth the wait.
The Flour Fiasco: Why Too Much or Too Little Sabotages Structure
Flour provides the foundational structure for your cookies. But like any good foundation, it needs to be just right. Too much flour, and your cookies become dry, crumbly, and dense – the opposite of puffy. Too little, and they’ll spread excessively, becoming thin and crispy (though often not in a good way).
The biggest culprit here isn’t the recipe, but imprecise measurement. Many home bakers scoop flour directly from the bag with their measuring cup. This compresses the flour, adding far more than the recipe intends. In my experience, this can easily add 20-30% more flour than needed, throwing the entire balance of your dough off.
The solution is simple and transformative: measure by weight using a digital kitchen scale. This is the gold standard in baking for a reason – it’s accurate and eliminates guesswork. If you don’t have a scale, use the ‘spoon and level’ method: lightly spoon flour into your dry measuring cup until it overflows, then use the back of a knife or straight edge to level it off without compacting. This ensures you’re adding the right amount of structure to support that beautiful puff.
The Chilling Conundrum: The Secret to Preventing Premature Spread
Skipping the chill time for cookie dough is one of the most common shortcuts I see, and it’s almost always a direct path to flat cookies. Many recipes suggest chilling the dough, but few truly emphasize why it’s so important or how long is sufficient.
Chilling cookie dough accomplishes several critical things that contribute to puffiness:
- Solidifies the Butter: When the dough is cold, the butter (and other fats) firm up. This means the butter takes longer to melt in the oven. Instead of spreading immediately, the cookie has time to set its structure, developing those desirable edges and a puffy center, before the fat fully melts and allows it to spread.
- Hydrates the Flour: Chilling gives the flour time to fully absorb the liquid in the dough. This further develops gluten, which adds to the cookie’s structure and chewiness. A well-hydrated dough is less likely to spread too much.
- Intensifies Flavor: While not directly related to puffiness, chilling allows the flavors in the dough to meld and deepen. This is a delightful bonus for patience.
My strong recommendation is to chill your dough for a minimum of 30 minutes, but ideally 2-4 hours, or even overnight. For extra insurance, you can even scoop your dough balls onto the baking sheet and then chill the entire sheet. This ensures the dough is as cold as possible when it hits the hot oven, maximizing that initial structural set before spreading begins.
The Baking Sheet Betrayal: Greased vs. Parchment (And Why It’s Not What You Think)
Many bakers instinctively grease their baking sheets, assuming it’s the best way to prevent sticking. While helpful for some applications, for cookies intended to be puffy, a greased sheet can actually work against you. The slick surface of a greased pan provides less friction, allowing the cookie dough to spread more easily and rapidly in the initial stages of baking, before its structure can firm up. This, once again, leads to flatter cookies.
What works? Parchment paper or silicone baking mats. These materials provide a non-stick surface without the excessive slickness of grease. They create a slight drag, which helps the cookie maintain its shape and rise rather than spreading out too quickly. Additionally, they promote more even heat distribution, preventing burnt bottoms while the centers are still undercooked. This even cooking allows the cookies to set properly and puff up consistently.
I always use parchment paper, and I cut it to fit my baking sheets perfectly. This prevents wrinkling and ensures the cookies have a consistent surface to bake on. If you’re using silicone mats, ensure they are clean and free of any residual grease from previous baking.
Oven Temperature and Overcrowding: The Silent Killers of Cookie Volume
Beyond the dough itself, your oven environment plays a significant role in how your cookies bake. Two common issues I observe are incorrect oven temperature and overcrowding the baking sheet.
Firstly, oven temperature variability is real. Most home ovens are not perfectly accurate, and their temperature can fluctuate. If your oven is running too cool, cookies will spread more before they have a chance to set, leading to flatness. If it’s too hot, the outsides might burn before the inside is cooked through, resulting in an uneven texture. I highly recommend investing in an inexpensive oven thermometer to verify your oven’s true temperature. Adjust your baking temperature accordingly – a perfectly calibrated 350°F (175°C) is typically ideal for many cookie recipes.
Secondly, overcrowding the baking sheet is a trap many fall into when trying to get all cookies baked at once. When you place too many cookie dough balls close together on a single sheet, several problems arise:
- Reduced Airflow: The cookies release steam as they bake. Too many cookies inhibit proper air circulation around each one, leading to uneven baking.
- Temperature Drop: A densely packed tray can cause a significant temperature drop when placed in the oven, similar to an underheated oven. This gives the cookies more time to spread before setting.
- Steaming, Not Baking: With limited airflow, cookies can end up steaming rather than baking properly, resulting in a softer, less structured cookie. Aim to leave at least 2 inches (5 cm) between each cookie dough ball on the baking sheet. If you have a smaller oven or larger batches, bake in multiple rounds, ensuring each batch gets the optimal space and heat.
Frequently Asked Questions
Q: My cookies are flat and also crispy. What’s going on?
A: This is often a sign of too much butter, butter that was too warm/melted, or too little flour. The excess fat causes the cookies to spread rapidly, creating a thin structure that crisps up quickly. Ensure your butter is properly softened (not melted) and measure your flour accurately. Chilling the dough is also crucial here.
Q: Can I use less sugar to prevent spreading and make them puffier?
A: While less sugar can sometimes reduce spread, sugar also plays a vital role in texture, moisture, and browning. Drastically reducing sugar can lead to a tougher, less pleasant cookie. Focus on the other factors like butter temperature, flour measurement, and chilling instead, which are more effective for puffiness without compromising flavor or chewiness.
Q: Why do my cookies look perfect in the oven but flatten once they cool?
A: This is often due to underbaking or insufficient chilling. If the cookies haven’t fully set their internal structure, they will collapse as they cool. Make sure you’re baking them long enough (until the edges are golden and the centers look set, even if slightly soft), and consider extending your dough chilling time.
Q: Does the type of leavening agent (baking soda vs. baking powder) affect puffiness?
A: Yes, absolutely! Baking soda reacts with acids in your dough (like brown sugar, buttermilk, or cocoa powder) to produce carbon dioxide gas, aiding in spread and some lift. Baking powder is a double-acting leavener, meaning it reacts once with moisture and again with heat, providing more consistent lift. Many puffy cookie recipes use a combination or rely heavily on baking powder for that vertical rise. Ensure your leavening agents aren’t expired, as old leaveners lose their potency.
Q: Does the temperature of the eggs matter?
A: Yes, similar to butter, room temperature eggs emulsify better with the fat and sugar in your dough, creating a smoother, more uniform batter with better-trapped air. Cold eggs can cause the butter to seize up, leading to a less aerated dough and potentially flatter cookies. Take them out of the fridge at least 30 minutes before baking.
Achieving that perfectly puffy cookie isn’t a dark art; it’s a science. By understanding these common pitfalls – from the state of your butter to the specifics of your baking environment – you can transform your baking results. So next time you reach for the flour and sugar, remember these simple yet powerful adjustments. Your perfectly puffy, chewy cookies are just a few thoughtful steps away. Happy baking!
Written by Dr. Anya Sharma
Nutrition science, meal planning, dietary habits
A registered dietitian with a PhD in Nutritional Sciences, Anya focuses on sustainable eating habits and evidence-based dietary advice.
You Might Also Like

Why Your Home Garden Isn't Thriving (And The Simple Shifts That Changed Everything For My Harvests)
Struggling with a lackluster home garden? Discover the counter-intuitive shifts in soil, watering, and plant choice that transformed my harvests.

Why Your Homemade Pizza Crust Isn't Crispy (And The Pro Secrets That Deliver Pizzeria-Quality Crunch Every Time)
Unlock pizzeria-quality crispy pizza crust at home. Discover common mistakes and pro secrets for perfect crunch every time, by Dr. Anya Sharma.
Why Your Homemade Sauces Are Too Thin and Lackluster (And The Pro Secrets for Rich, Velvety Perfection Every Time)
Ever wonder why restaurant sauces are so rich while yours fall flat? Discover the professional techniques for velvety, flavorful homemade sauces.